

This post contains unpaid advertising
A nice, relaxed little knitting project. Without too much calculating or modifying. Well, that was the plan. But in the meantime you know this isn’t how I tackle stuff. To be honest I knitted this easy little piece of clothing about 3 times before getting it right!
The Yarn & Pattern
Knitting pattern
Icon Dress by Kari-Helene Rane
Size S (Width) & L (Length)
Yarn
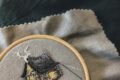
Regia 6-fädig Tweed (70 Dark Green)
Alterations
High-Hip Length
FBA (2cm)
Larger Armholes
But first a few words about the material. I had two 150g skeins of Regia 6-fädig Tweed (discontinued), which I bought on sale in my local yarn and fabric shop a long time ago. It’s a nice tweedy DK-weight sock yarn with mostly wool and a bit of nylon, which I initially wanted to knit into a pair of knee-length socks. But as you know my motivation for knitting socks is, let’s say, minimal.
I changed my mind about the yarn and decided to knit a vest out of it. I thought the amount of yarn should be suitable for either a cropped sweater or a sleeveless top and I had this image of the Icon Dress by Kari-Helene Rane on one of my pinterest boards and always thought it was a top as there is only the upper part visible. For a short time I thought about knitting the whole dress but as I hadn’t had such an amount of yarn and I think this dress could be too heavy for my taste I settled with my first idea and cast it on as a top.
The original pattern is a knee-length dress with a simple cable pattern all over it and additional seed stitching in the skirt section. I am totally in love with the square neckline and the fake button tab. It is knit in pieces and seamed in the end, which is my preferred method for knitting clothes.
I thought a (too) long time about calling it a vest or a top. My first intention with the inspirational image was a vest maybe because of the fake button tab. And I preferred staying with it because I will wear it mostly over other pieces of clothing and so for me – this is a vest 😀
This turned out to be a real brain twister, at least for me. I thought it would be easy to begin at the waist as I wanted a short vest so I searched for the smallest amount of stitches in the pattern, started from there and messed it all up. Multiple times. It turned out to be a smart idea to read all the text right about the cable chart as it told me to ignore the first and last stitch for my size (XS on the first try). But as it seems I’m too lazy to even just read one whole headline and prefer casting on multiple times wondering why my patterning doesn’t work.
The Knitting
Actually I did knit a gauge. There is no discussion about a gauge in my world – except for small stuff like socks or things like shawls which don’t need any fitting either. But from there it went wrong. My gauge didn’t fit the suggested one exactly. But I thought the differences were small enough to get it right. Yeah.. it was. At least in the width. I followed the instructions – at least I wanted a brainless knit – and ended up with an awesome vest. Perfectly fitting for a … toddler?! Well that will take some time until I have a toddler at home.
As I seldom measure while knitting and prefer to calculate the rows beforehand to get the desired length I did not, you know, do useful stuff and just lengthen it on the go.
While the width was ok and the main problem was the length I tried blocking it quite heavily. But there wasn’t any chance it would fit me. Aside from this the armholes were much too short, making this one a rather restricting piece of clothing.
So I ripped the whole thing and started over. I decided to add a bit of width too and go up one size, as it was okay, but nothing better than that. I wanted to wear it over different tops so a bit of ease was not the worst idea. This time I knitted the size S for the width and L for the length and added a few rows at the beginning to get a high-hip length rather than waist-length as I wanted for the first time. Finished. Fitted. Well, at least beneath the armholes.
Because I obviously don’t learn from my mistakes I sewed the whole thing up and finished it before trying it on. Stupidity hurts. But not enough as it seems. I decided to just lengthen the armholes a bit this time, but as all the threads were already sewn I cut the wrong thread right at the lower edge of the armhole. It must be fate. So I ripped the rest of it and began from the lower arm holes up, took out my calculator and spontaneously also added a small FBA. Just short rows this time and no combination with increases as I normally do. And then I lengthened the armholes. I knit the largest size armholes and added a few extra rows. And now finally. It fits! And I love it!
The fit still isn’t totally perfect. As you can see in some of the images it slides up a bit around the waist. Maybe the lower part is still a bit too tight. But it’s okay for me.
Restarting all those times was the right decision, even though I could have made it work the first time 😉
With this piece I now have the first item of my fall/winter sewing plans finished. This is one more than the last time! And I even have knitted the gauge for the next piece, yay!
Linked on MeMadeMittwoch


Hach diese Fotos, große Klasse. Ich hätte zwar alle drei Stufen heller gemacht – aber künstlerisch wertvoller sind Deine Bilder! Wenn ich es richtig erkenne trägst Du über einem Rolli eine Bluse und darüber eine gestrickte Weste. Perfekt passt der lange Rock dazu, wunderbar stimmig!
Da bist Du bestens gerüstet für die dunkle und kühe Jahreszeiten. LG Kuestensocke
Dankesehr ☺️
Ja es ist tatsächlich wunderbar warm ?
Uiuiui, das war ja ein langer Weg bis zur kleinem, im übrigen ganz entzückenden, Weste .
Ganz wunderbar finde ich auch dein geschichtetes Outfit und die märchenhaft anmutenden Bilder.
LG von Susanne
Ach ja, das Stricken erfordert wirklich Geduld und Durchhaltevermögen. Gratulation, dass Du beides hast und diese tolle Strickweste fertiggestrickt hast.
Die Fotos sind wunderschön geworden!!
Viele Grüße
Sandra
Vielen Dank 😀
Although the journey was problematic, the result is beautiful and I hope you will wear it loads!
Thank you very much 😀
[…] complement my wardrobe perfectly and be suitable for the coming fall. A vest was the answer. My Icon-Vest has been a workhorse in the colder months and I wanted something similar to change things […]