

DIY Night Sky Mural
Today’s topic differs a bit from the other ones. One or the other may already have noticed the large category on the home page, which so far only contains a single post. Now it is time to fill the category ‘Living’ with a little life. As we are slowly renovating our rooms at the moment I want to document the process a bit. And that’s why I’m going to show you today how you can easily put a hand-painted starry sky on the wall of your room.
I will not explain how to paint a wall the right way, there are far more experienced people out there who can do that. This is only about the night sky 😉
Hopefully everything can be seen clearly in the pictures, because unfortunately I only took smartphone-photos and they did not turn out as well as I had hoped.

Inhalt
1. Gather your supplies
Colors
You need at least two colors, a very light and a very dark one. If you want you can of course use more than these two to bring in more shades, but I was lazy so it also works with just two colors.
- Background Color (dark blue or gray)
- Stars & Nebula Color (white or very light gray)
Tools
You will also need some tools which can be found in every household. The best is to try a bit which gives you the best effects. My tools of choice where
- an old dishcloth laid over a sponge
- a damp dishcloth
- a bit of cardboard as color palette
- an old spray bottle (mine was from a liquid hair-conditioner)
- The end of a brush, pen, etc. …
- a bit of wallpaper or sturdy paper for testing purposes
- and of course your wall-painting tools
Caution
As you are about to splatter the paint all over the wall it is quite important to protect the other walls and the floor! We renovated the whole room, including all the walls and the floor. This is why I didn’t do this and just began with the stars-wall, so possible stains on the other walls are going to be painted over. But if you don’t do this – protect your walls and floor.
2. Base Coat
Choose a nice dark color for your Base Coat. I used a very deep blue shade and painted my chosen accent wall two times with it.
Also take a bit of wallpaper (or any other paper which is stable enough for wall paint) and paint this too. This is your testing ground, where you can try your techniques before bringing them on the wall.
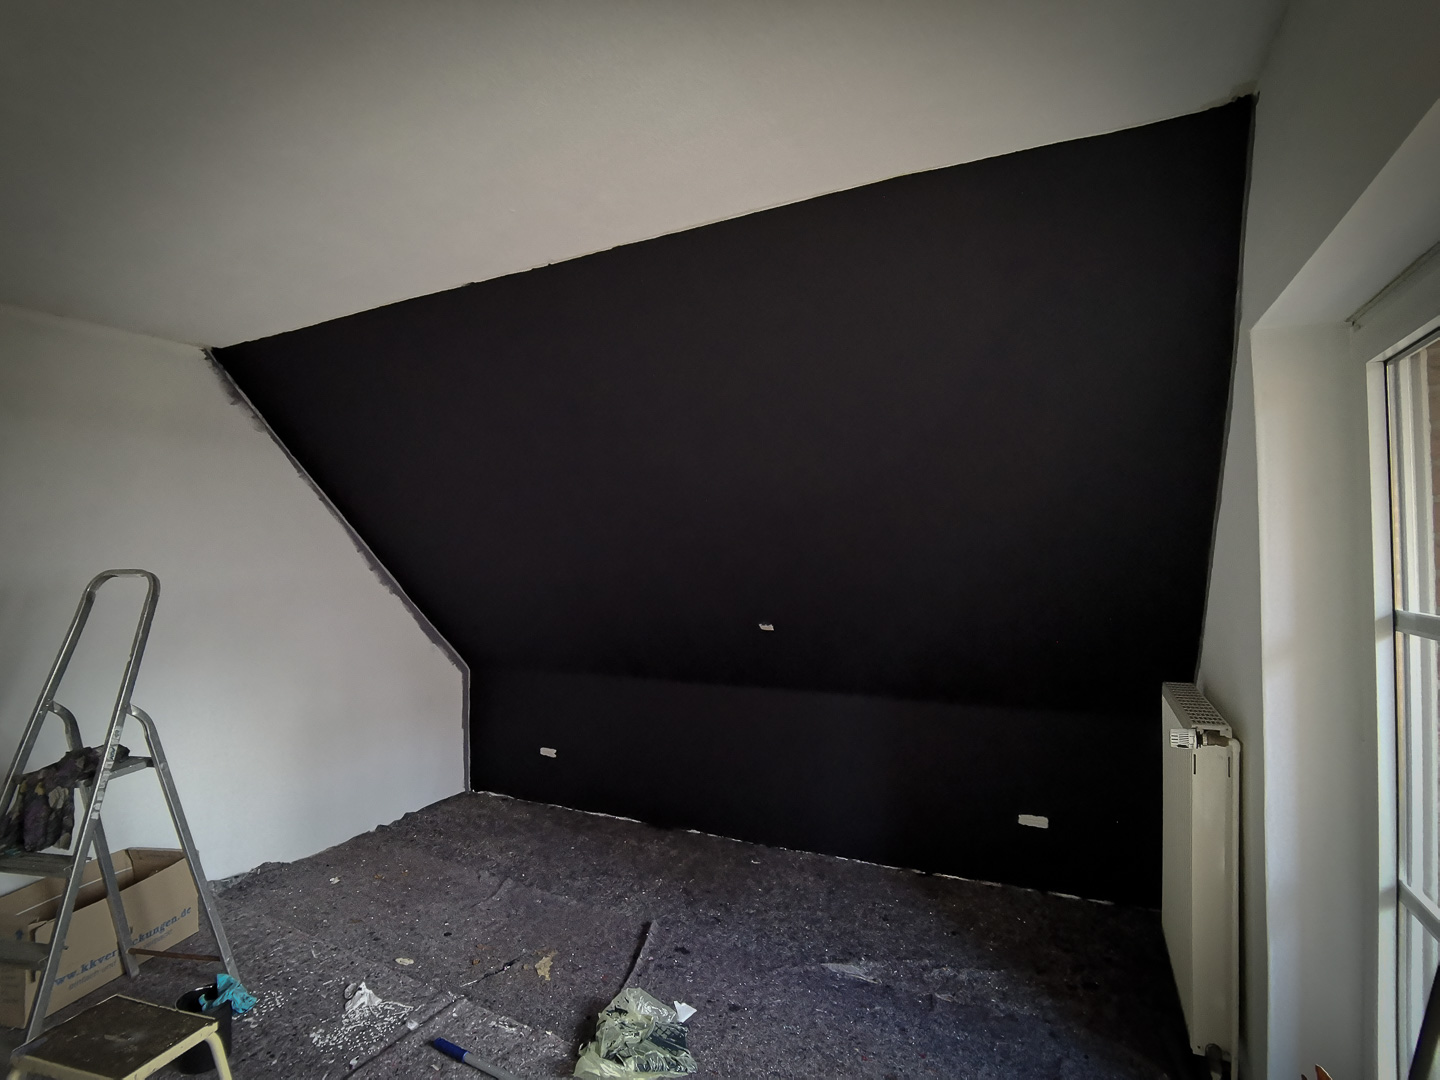
When the paint is completely dry, you can start with the fun part 😉
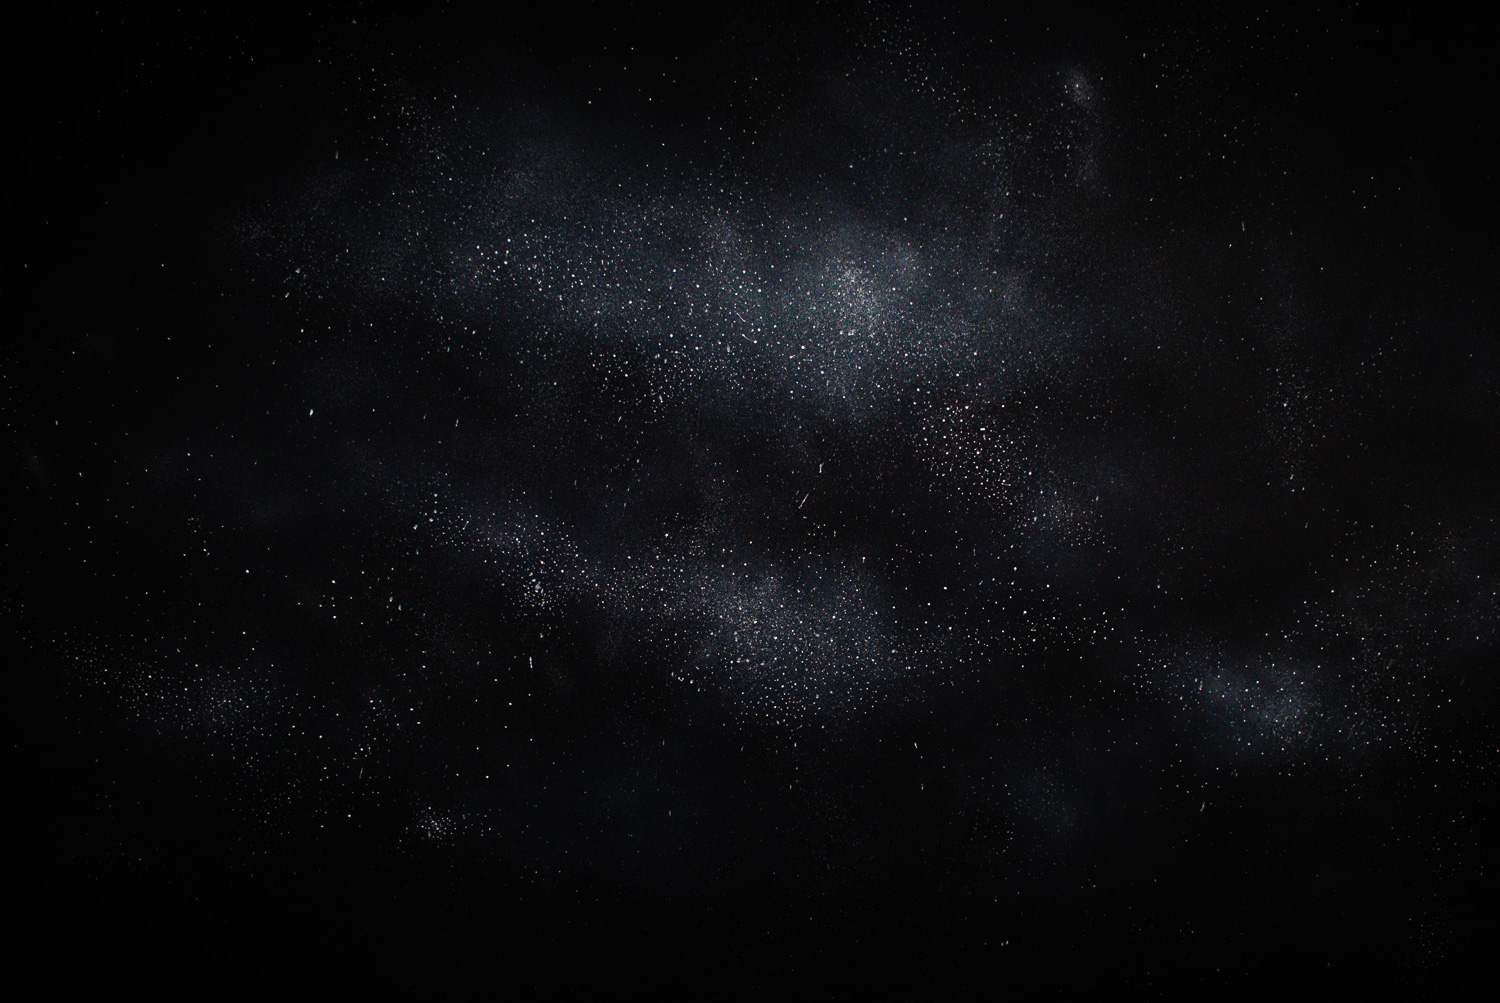
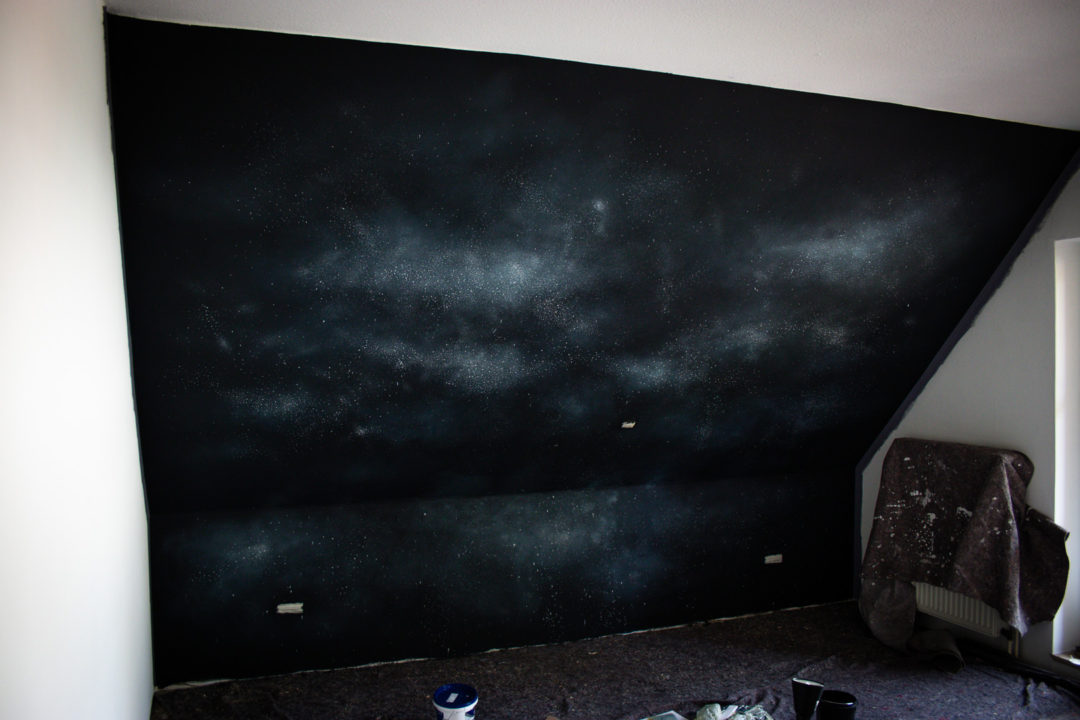
3. Structure
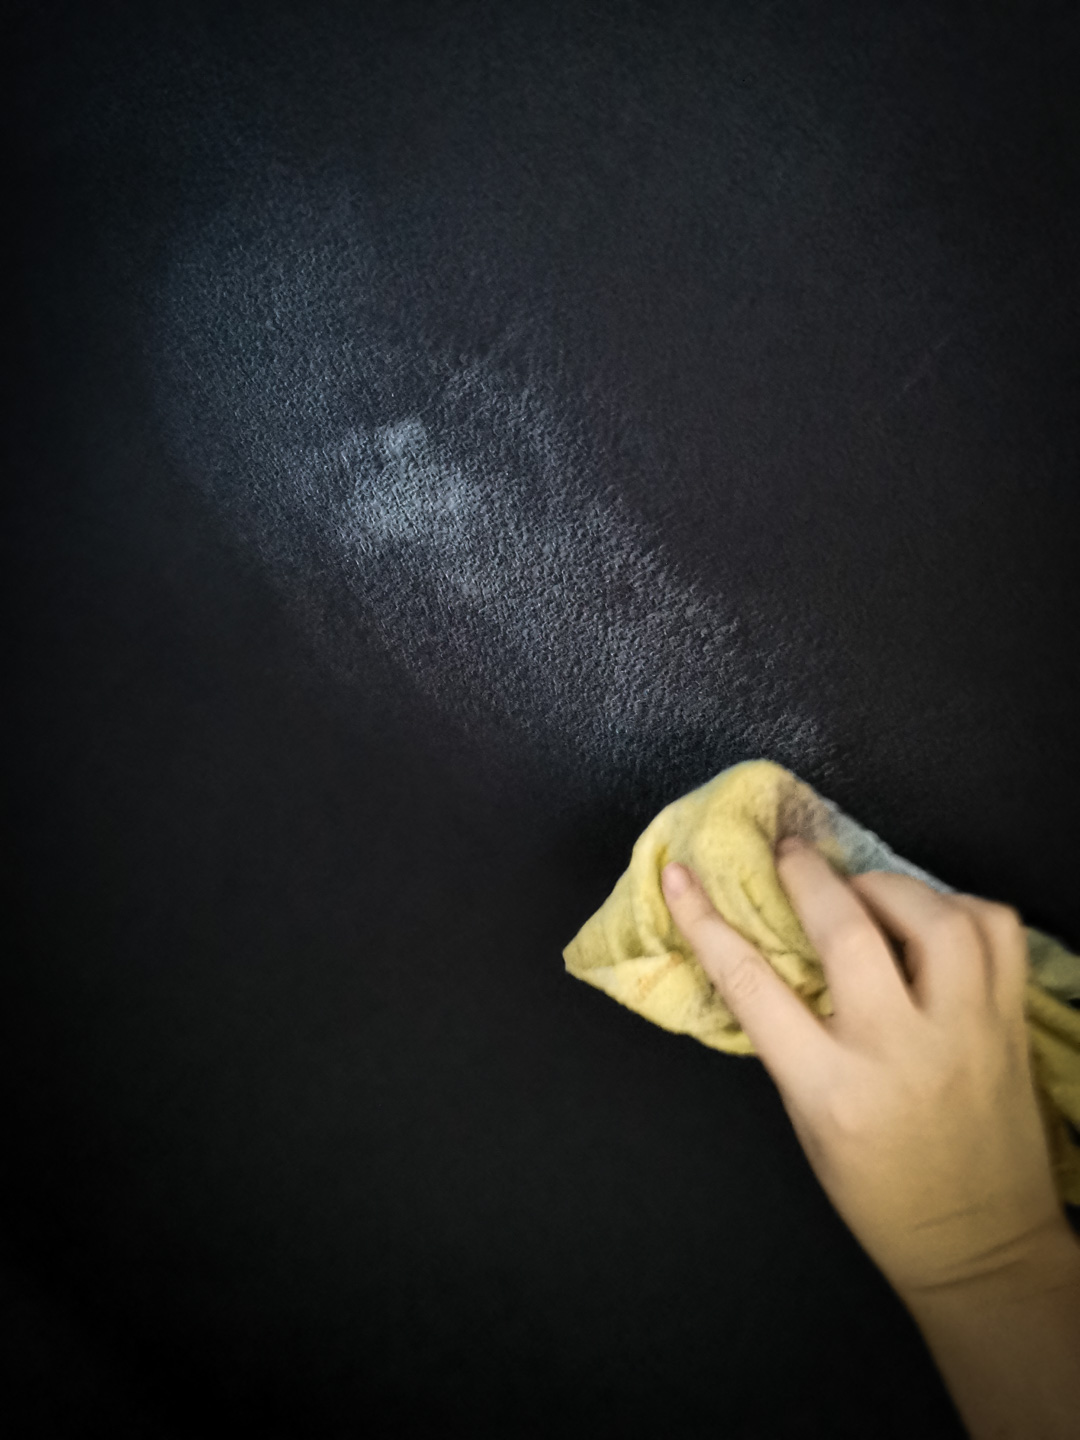
We will now bring a nice structure and depth into the painting. Take a lighter color – I chose the lightest of my colors cause I’m lazy (a very light gray) – but you can of course use more than one shade and build the image up gradually. If you don’t want to put your lightest color directly on the wall on the first try you can of course tone it a bit down by mixing it with a darker color.
Try a bit on your testing piece which tools are right for you. I used an old dishcloth which I put over a sponge, so it lays better in my hand. You could also use the sponge alone, but I preferred the structure the dishcloth brought.
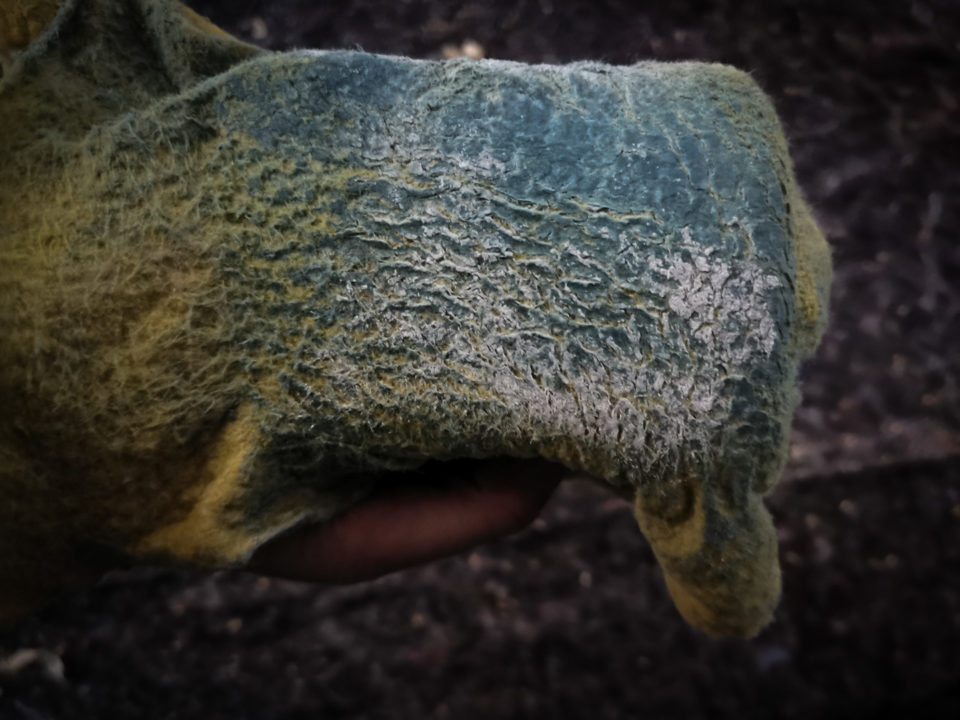
I also had another dishcloth with only water on it. Just a bit damp, not dripping wet.
Now put a bit of paint on your cardboard/color palette and take a very, very small amount – rather too little than too much – of paint and start applying it to the wall in circular movements. Work here without any pressure, so that a nice transition is formed. Every now and then, go over it with the damp cloth and spread it with the sponge cloth – this will distribute the color and the transition will be very soft. I always had the damp rag in one hand and the sponge in the other and always worked the whole thing nicely in alternation.
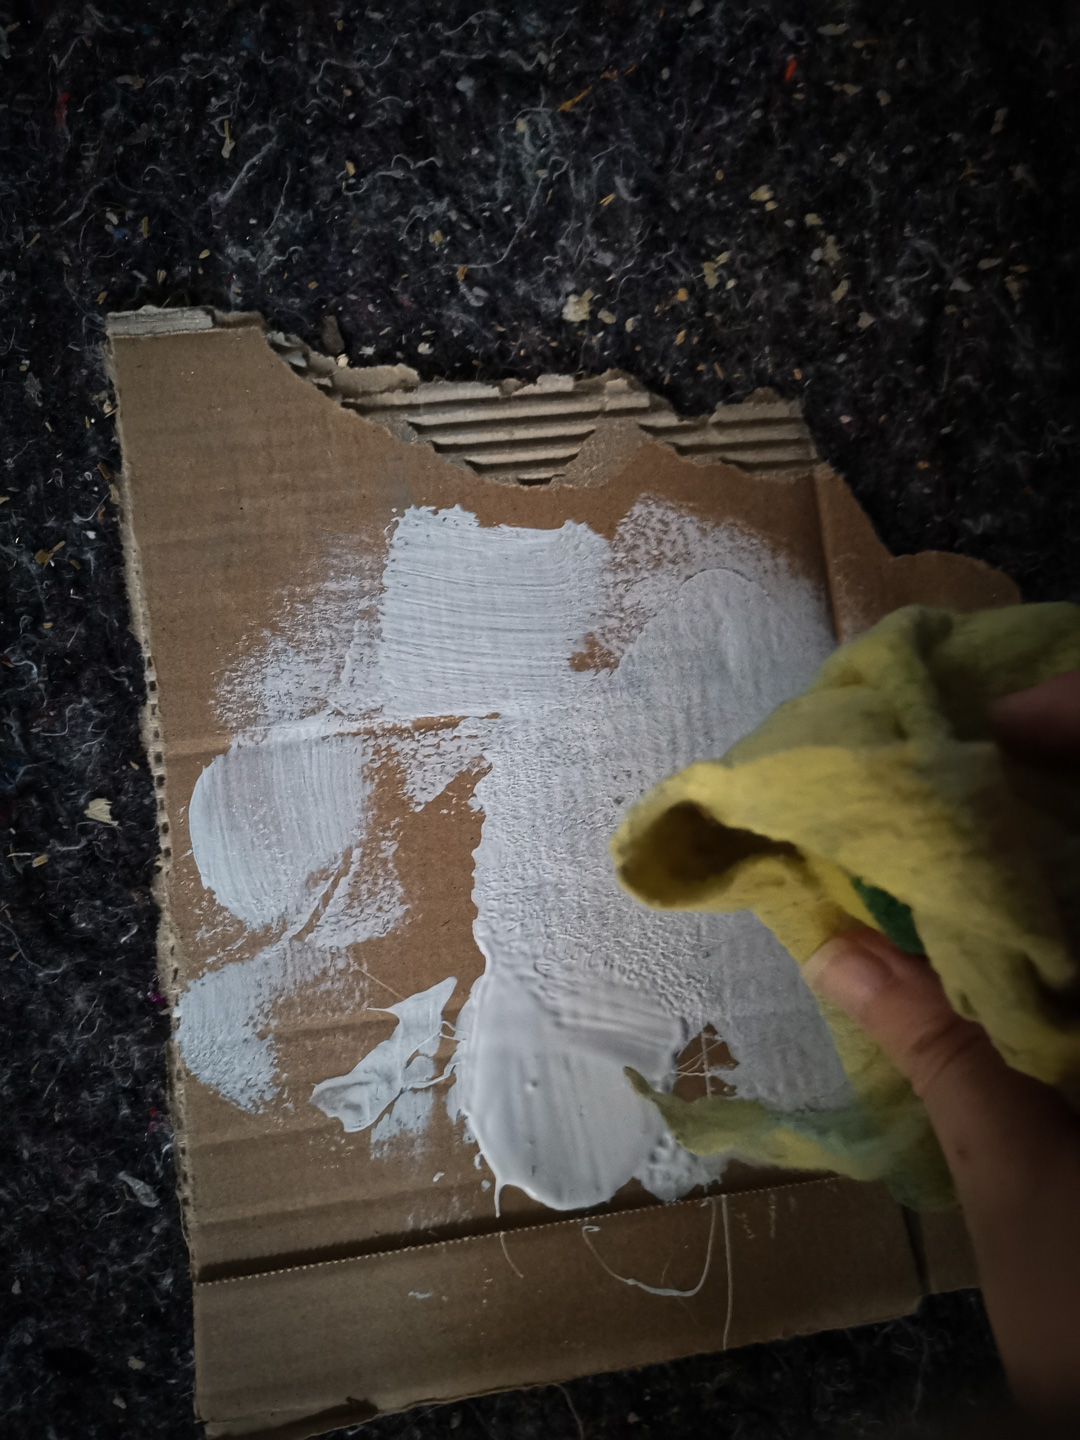
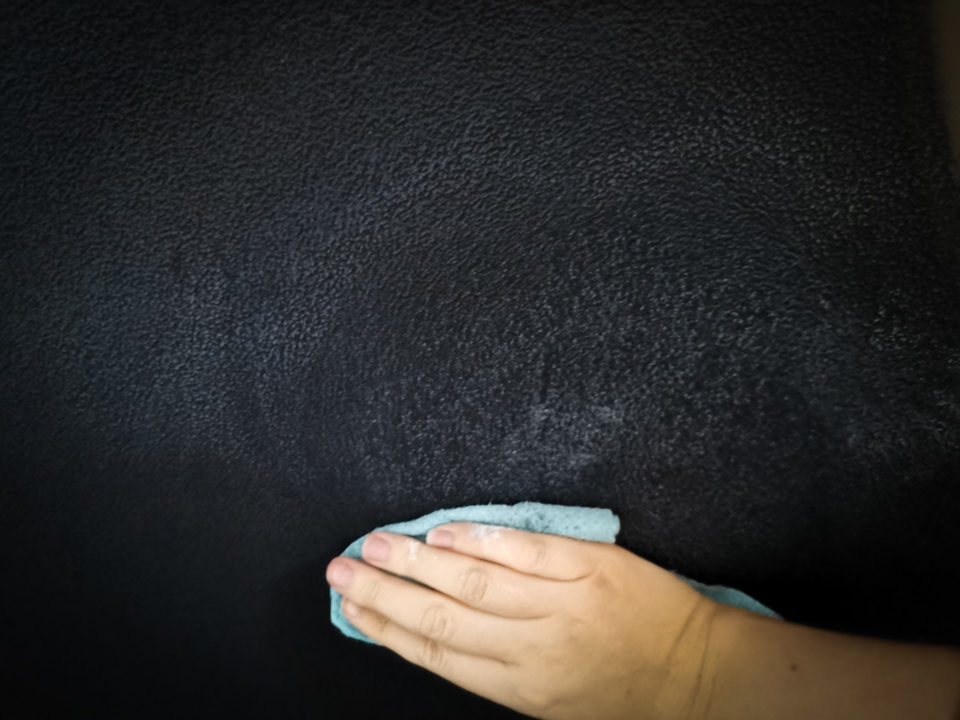
According to this principle, go over the entire wall until beautiful clouds have formed. If you have different colors, take the next lighter one and repeat.
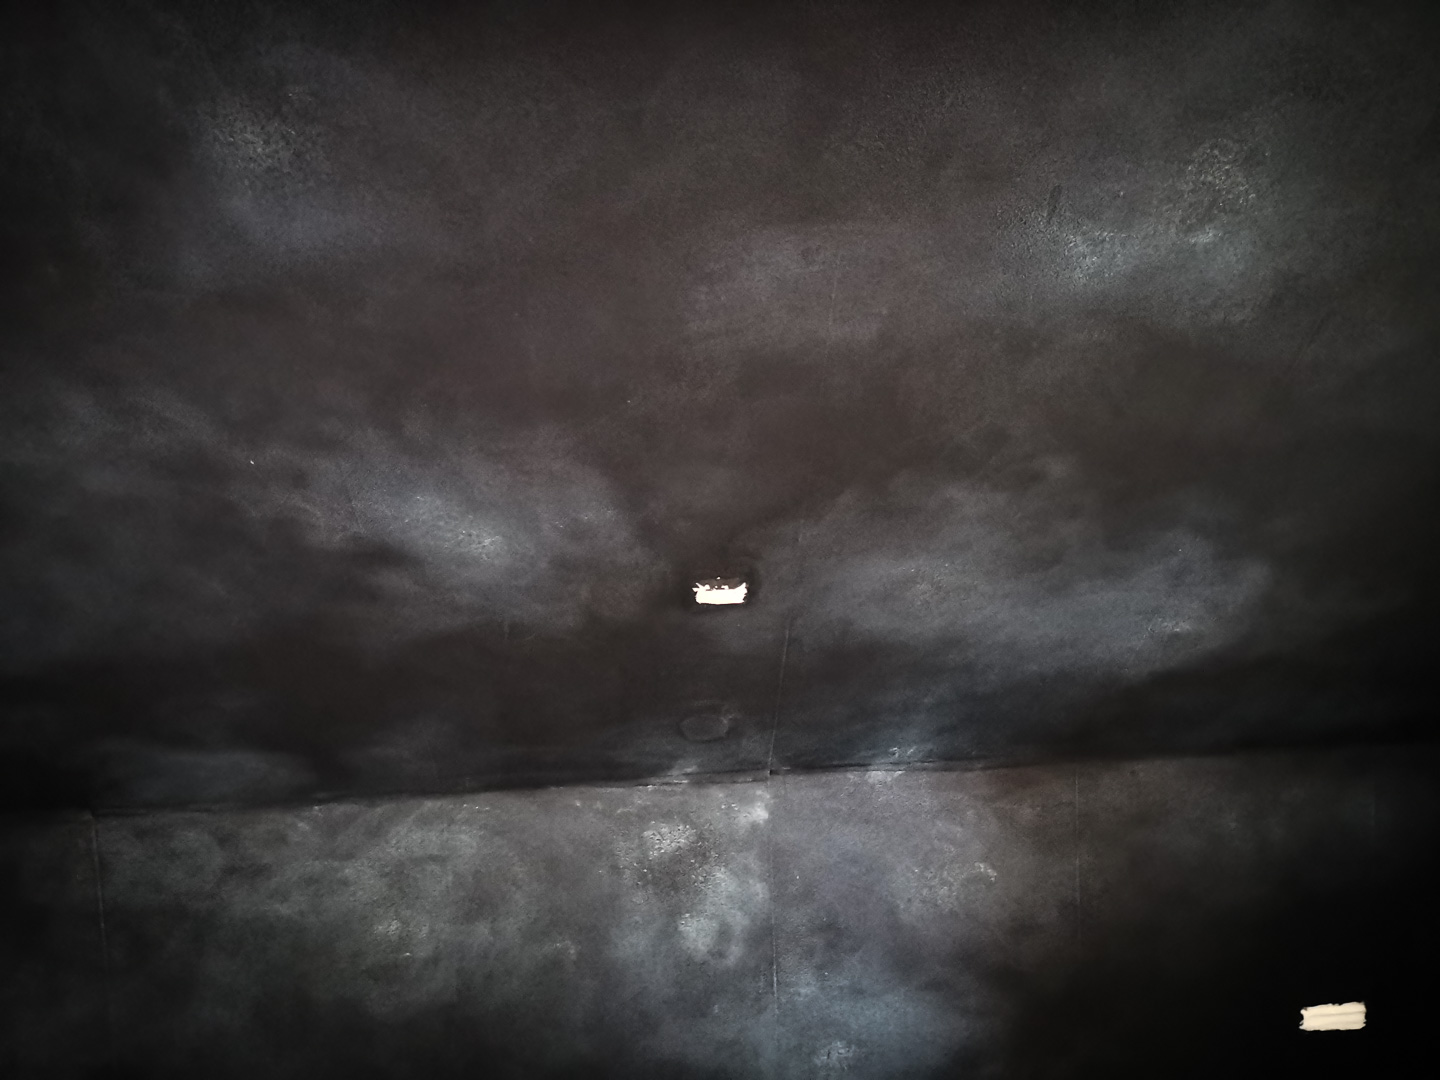
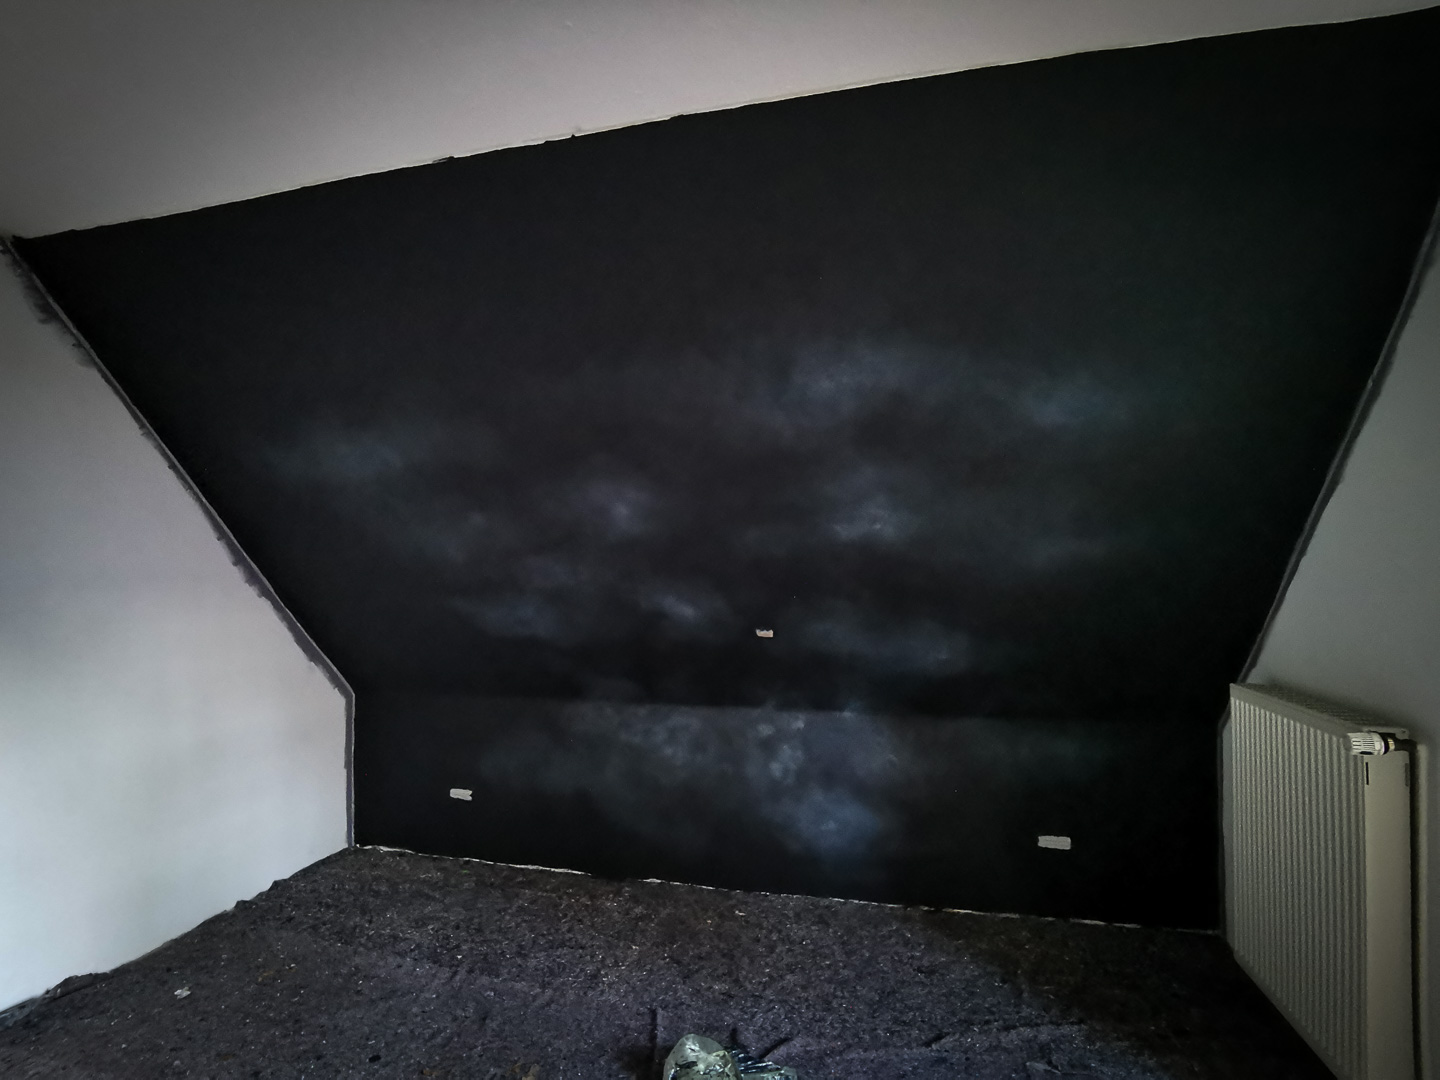
Here you can see the differences a bit. In the lower area (where I started and therefore tested around a bit) the transitions are not that clean and it looks a bit more ‘painted’. It then becomes much softer towards the top.
Now it’s time to let the wall dry again. Because you used just a tiny bit of paint this shouldn’t take too long this time.
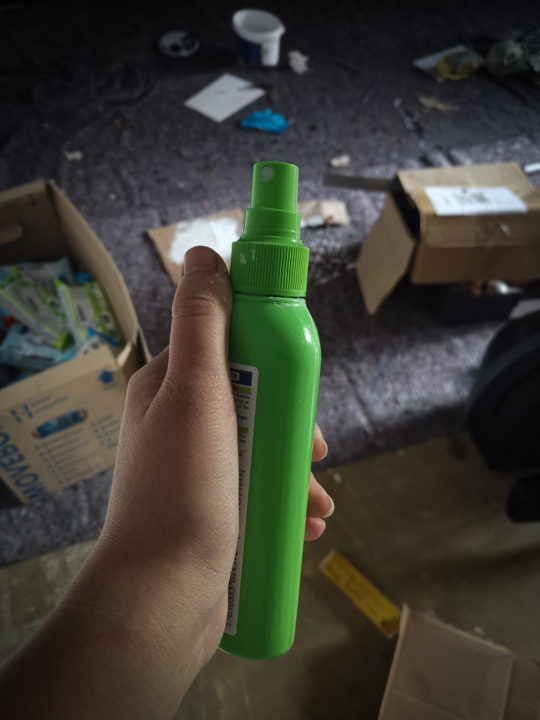
4. Stars – the rough work
To create a really beautiful field of stars, we need many, many stars. I tested a few options here – unsuccessfully – and ended up with a spray bottle.
In my case, this is an old spray conditioner bottle. It was a bit of a hassle because the spray head stuck together quickly, but it worked with a little patience. Perhaps a flower syringe or something similar would have worked a little better, but I didn’t have one 😀
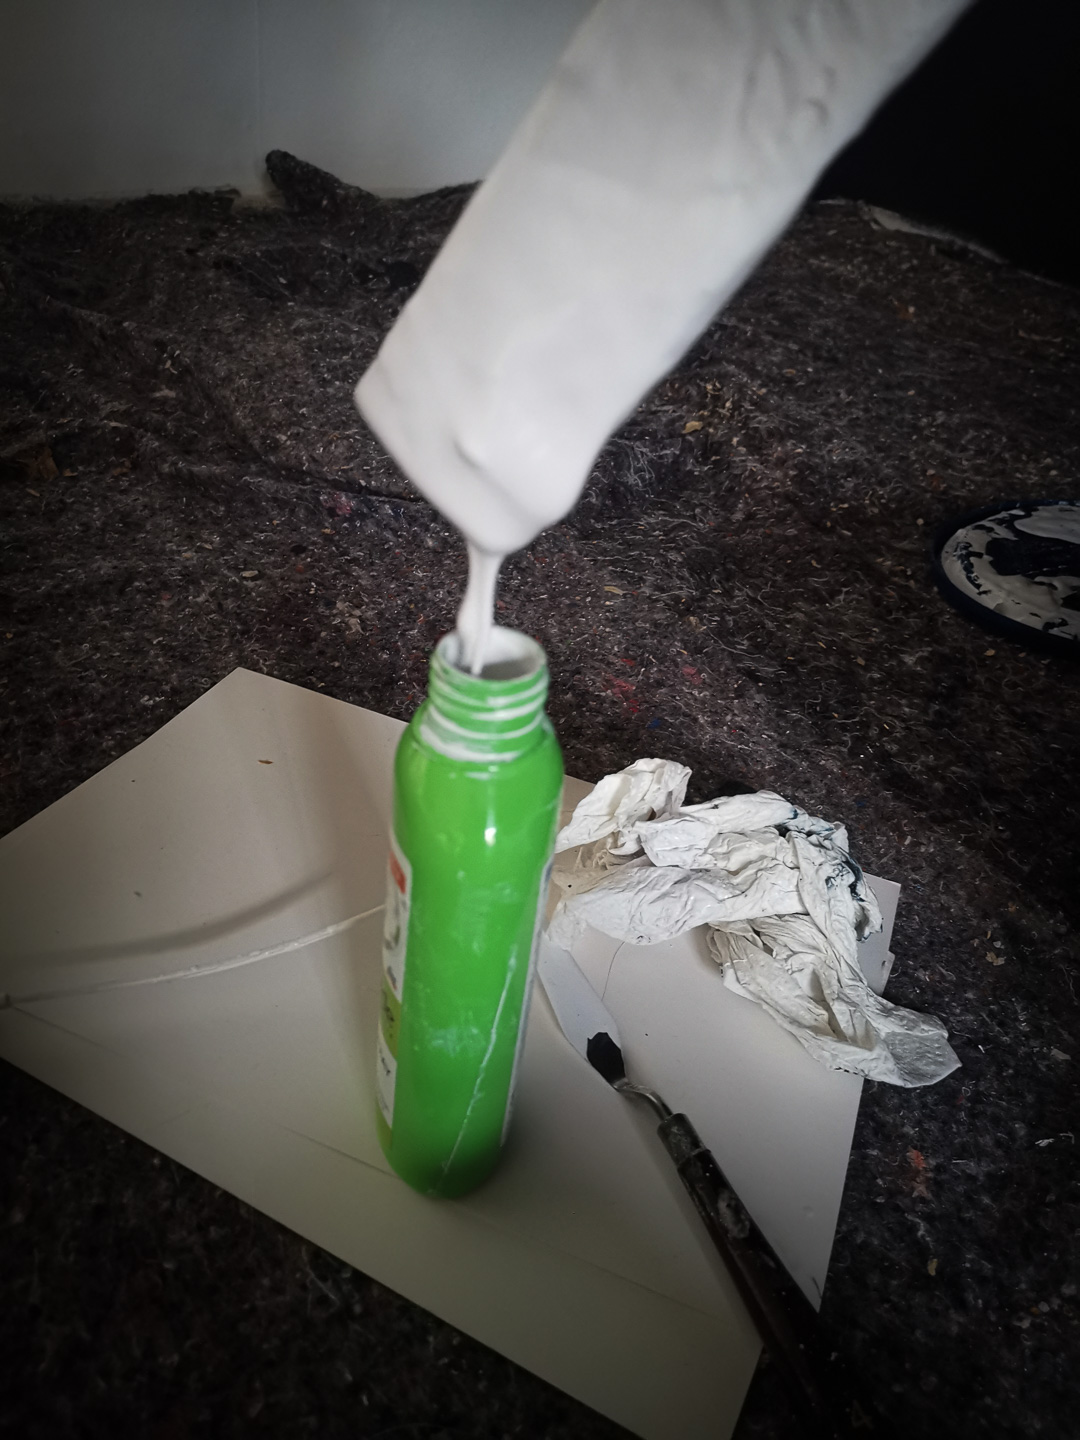
Rinse the bottle very carefully, then fill some color in it. I took the wooden stick, which I also used to stir the paint, and carefully let the paint run into the bottle. Then add a little water, shake, test (on the sample!) and repeat if necessary until the consistency is right.
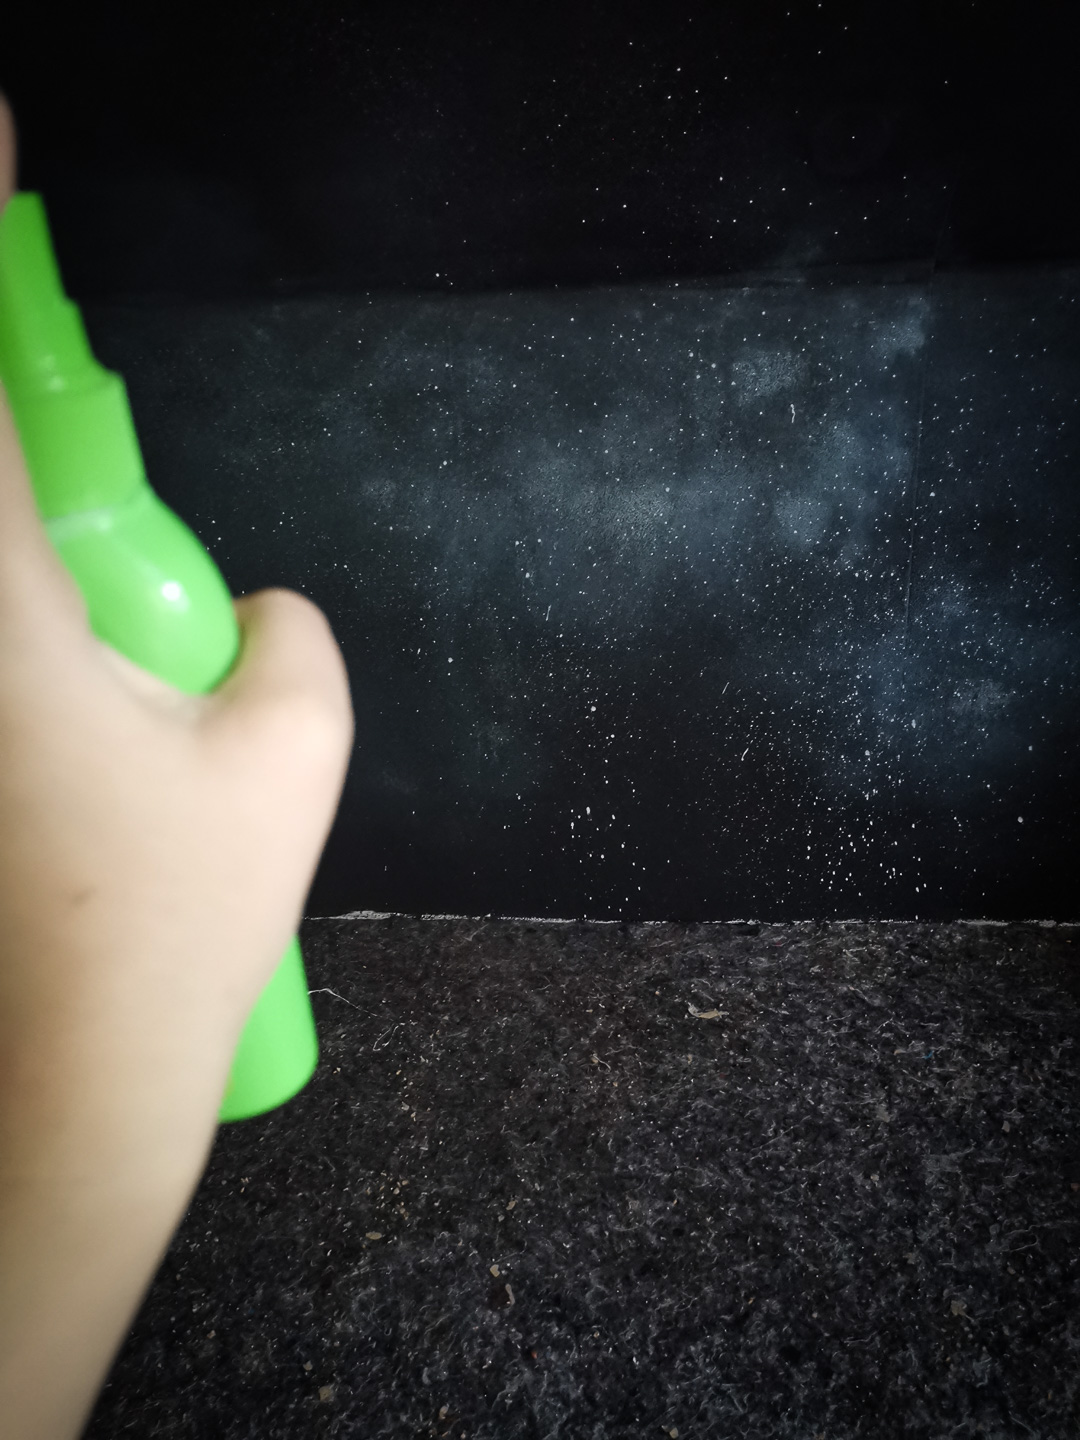
Take your time and test this on your sample piece. It could take a bit of practice to get a nice result. Also try out the right amount of distance. Better start too far away and reduce it slowly, than the other way around.
If you aren’t renovating the whole room it would be a nice idea to protect the other walls and the floor from paint splatter.
Now the color is sprayed on the wall. Here also test a bit with the appropriate distances and start with too much rather than too little distance from the wall and vary a little here.

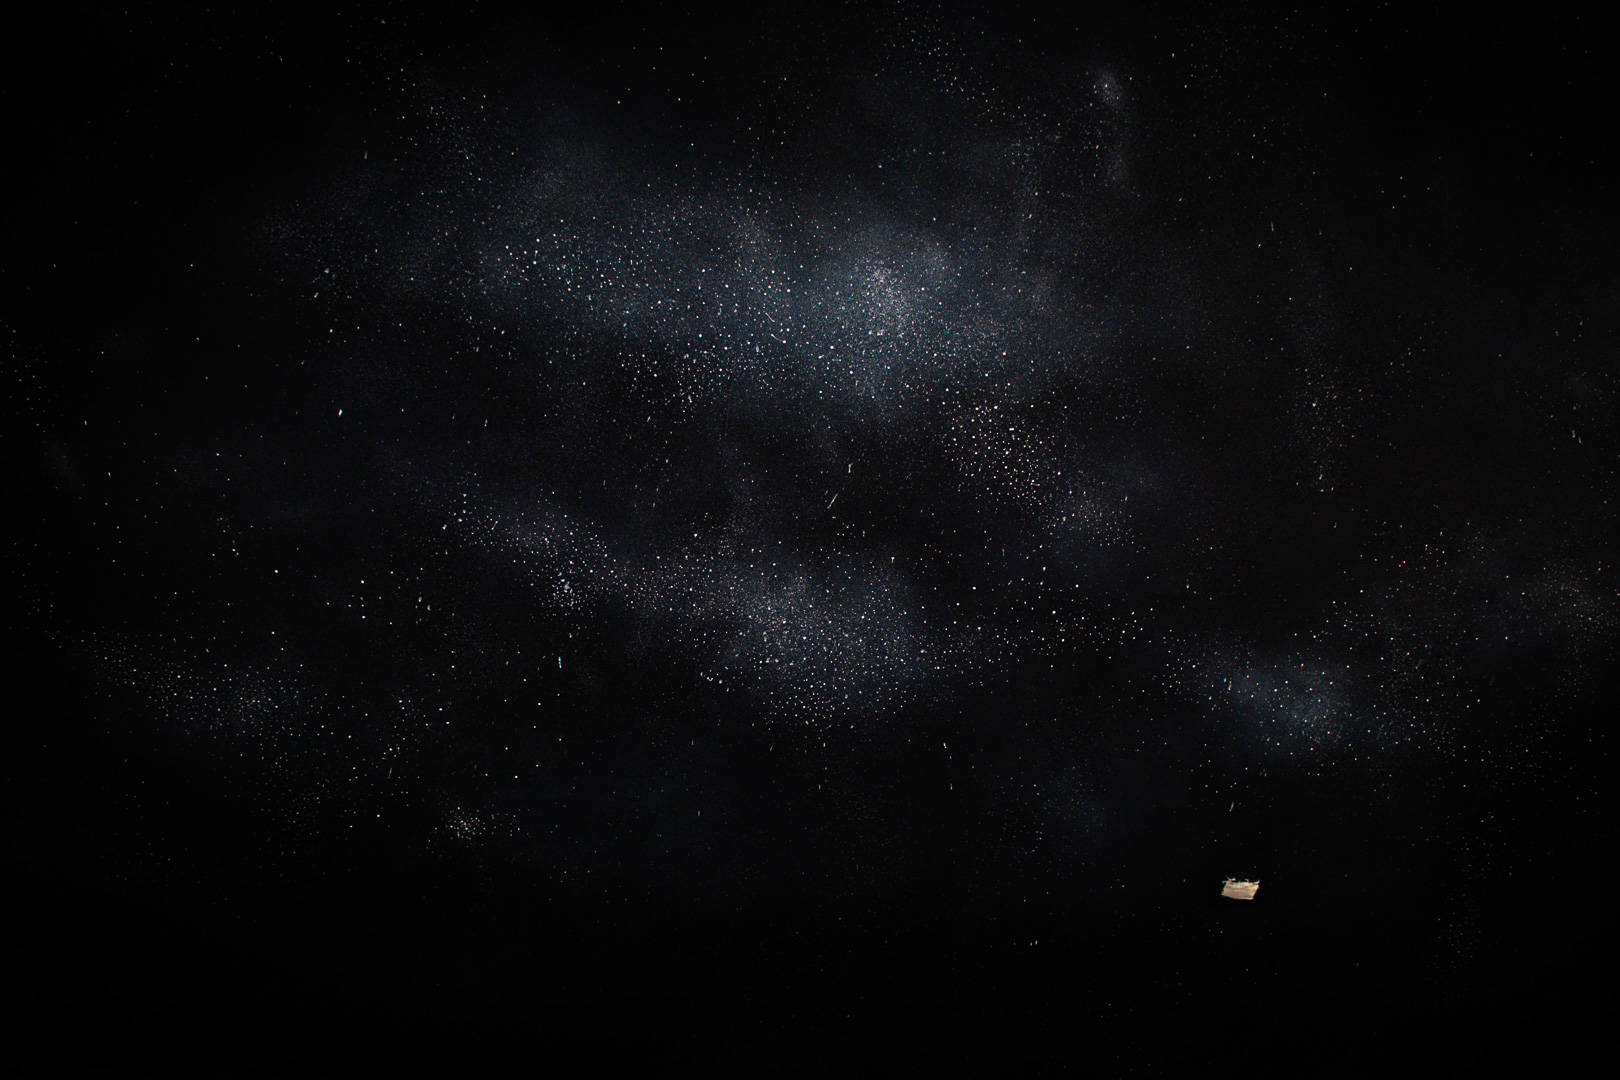
5. Stars – the fine work
Before we can put the individual stars on the wall, a little preparatory work is needed here as well: Turn on music or an audio book – so that you don’t run out of patience in between, because you need will a lot of patience now 😀
The stars will be dabbed on the wall, you can use the back of a brush for example. I also used one of these plastic skewers – for the smaller stars.

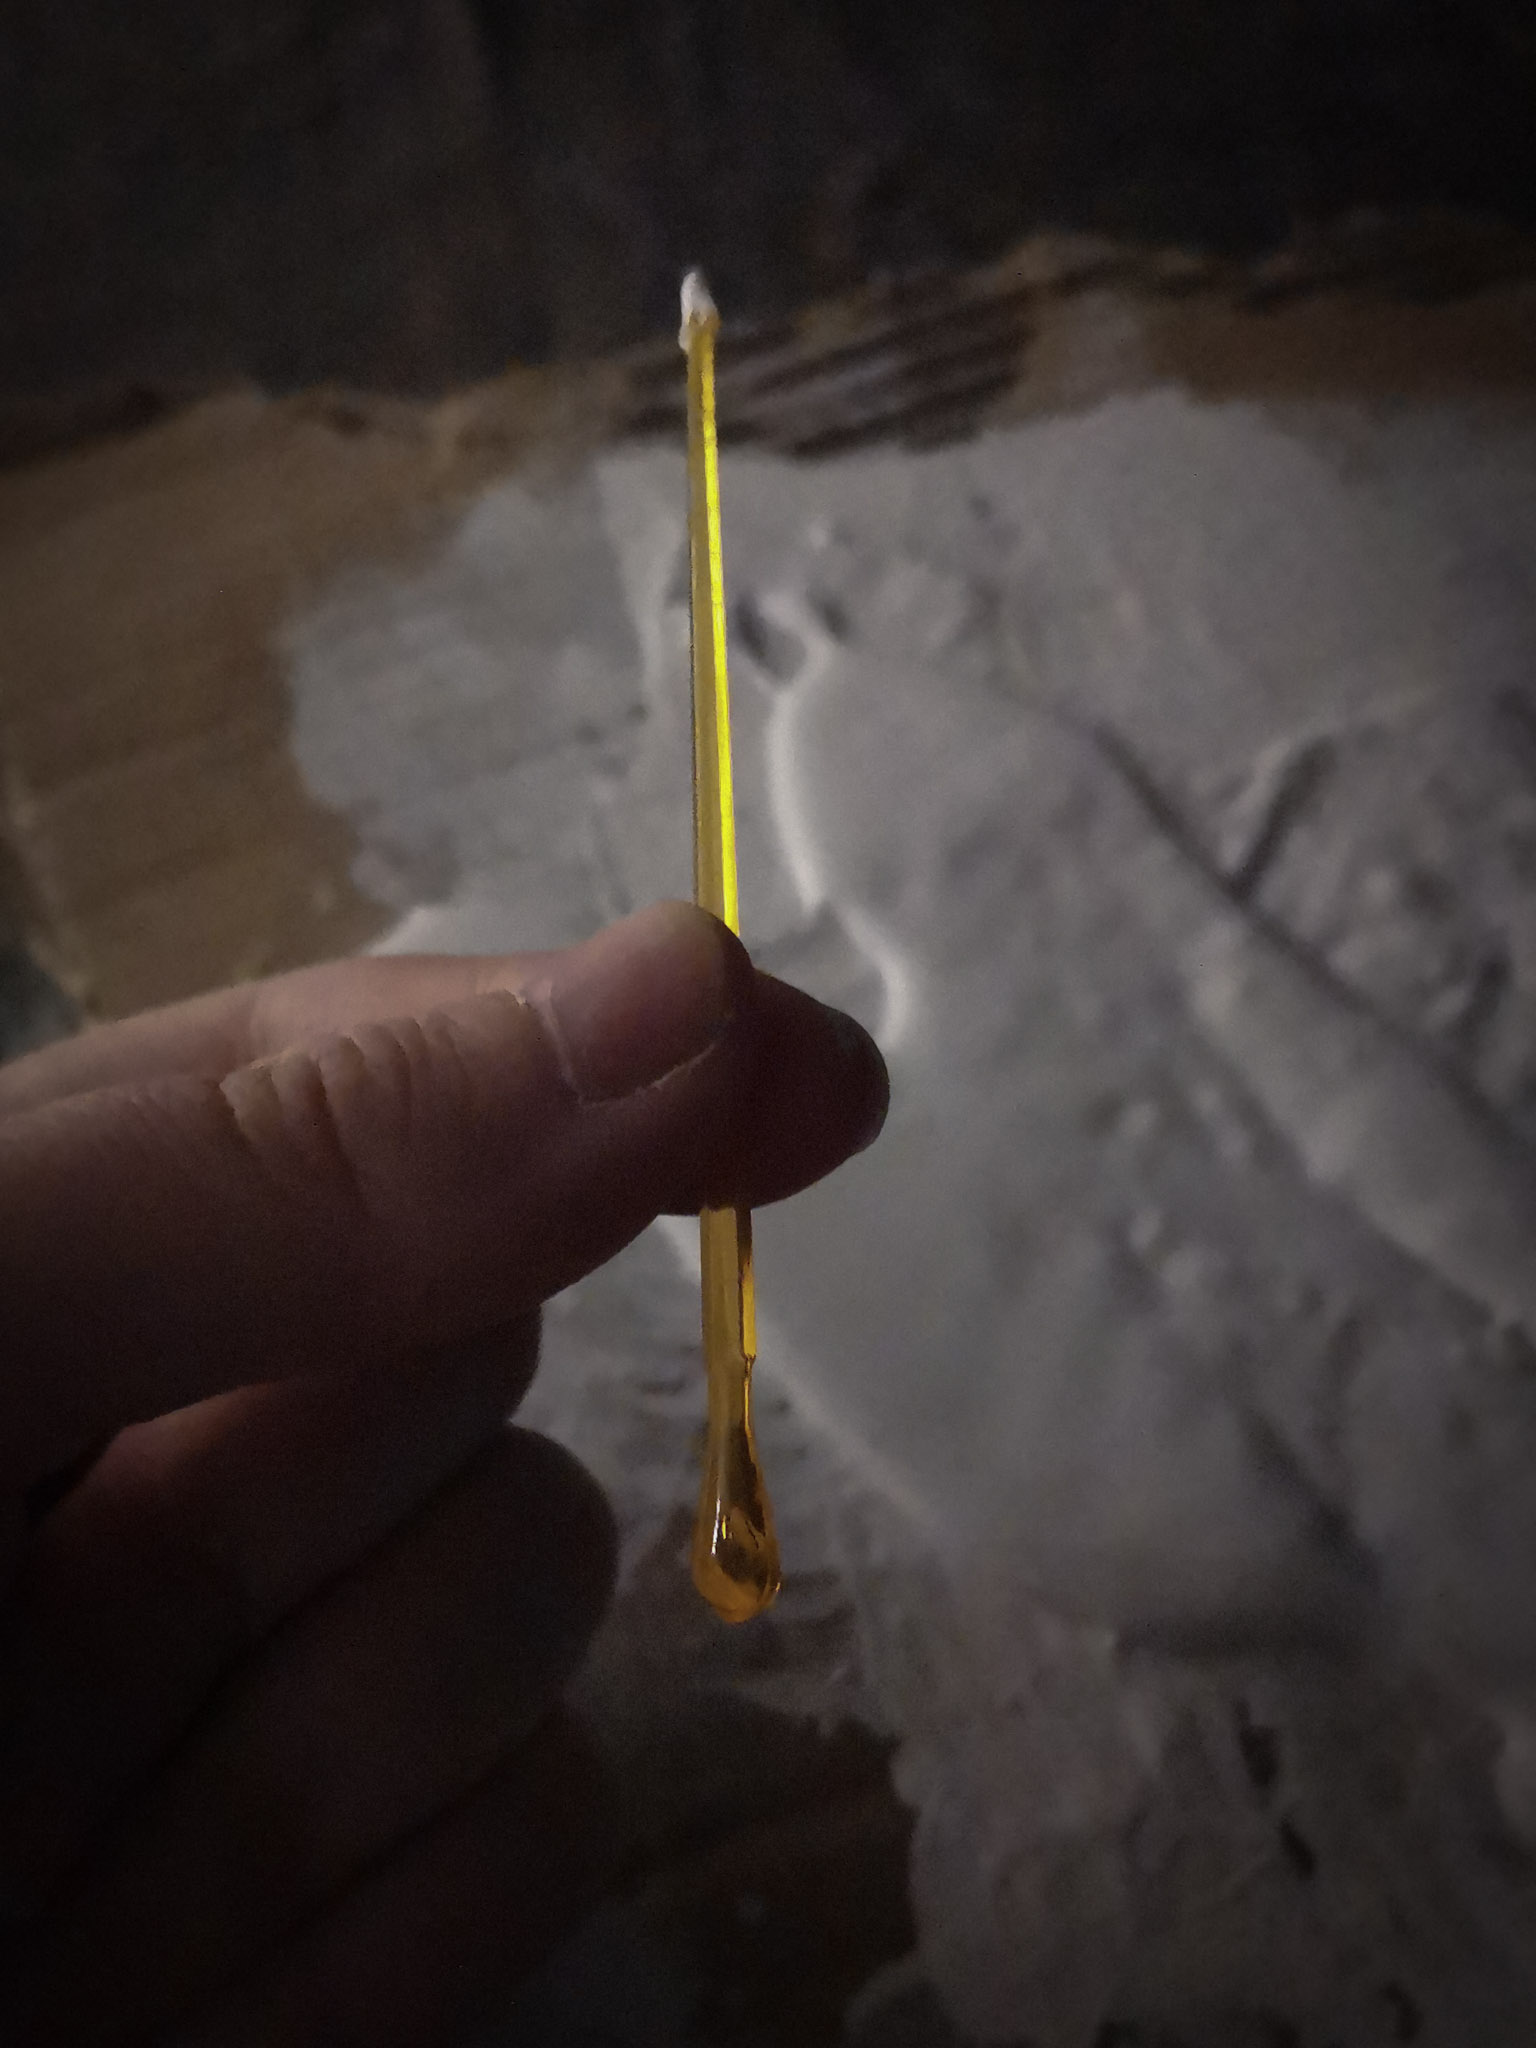
Now get the paint and put it on the wall. Make sure that you remove the brush / skewer far enough from the wall after dabbing before you put it back on. Otherwise something like this occurs:
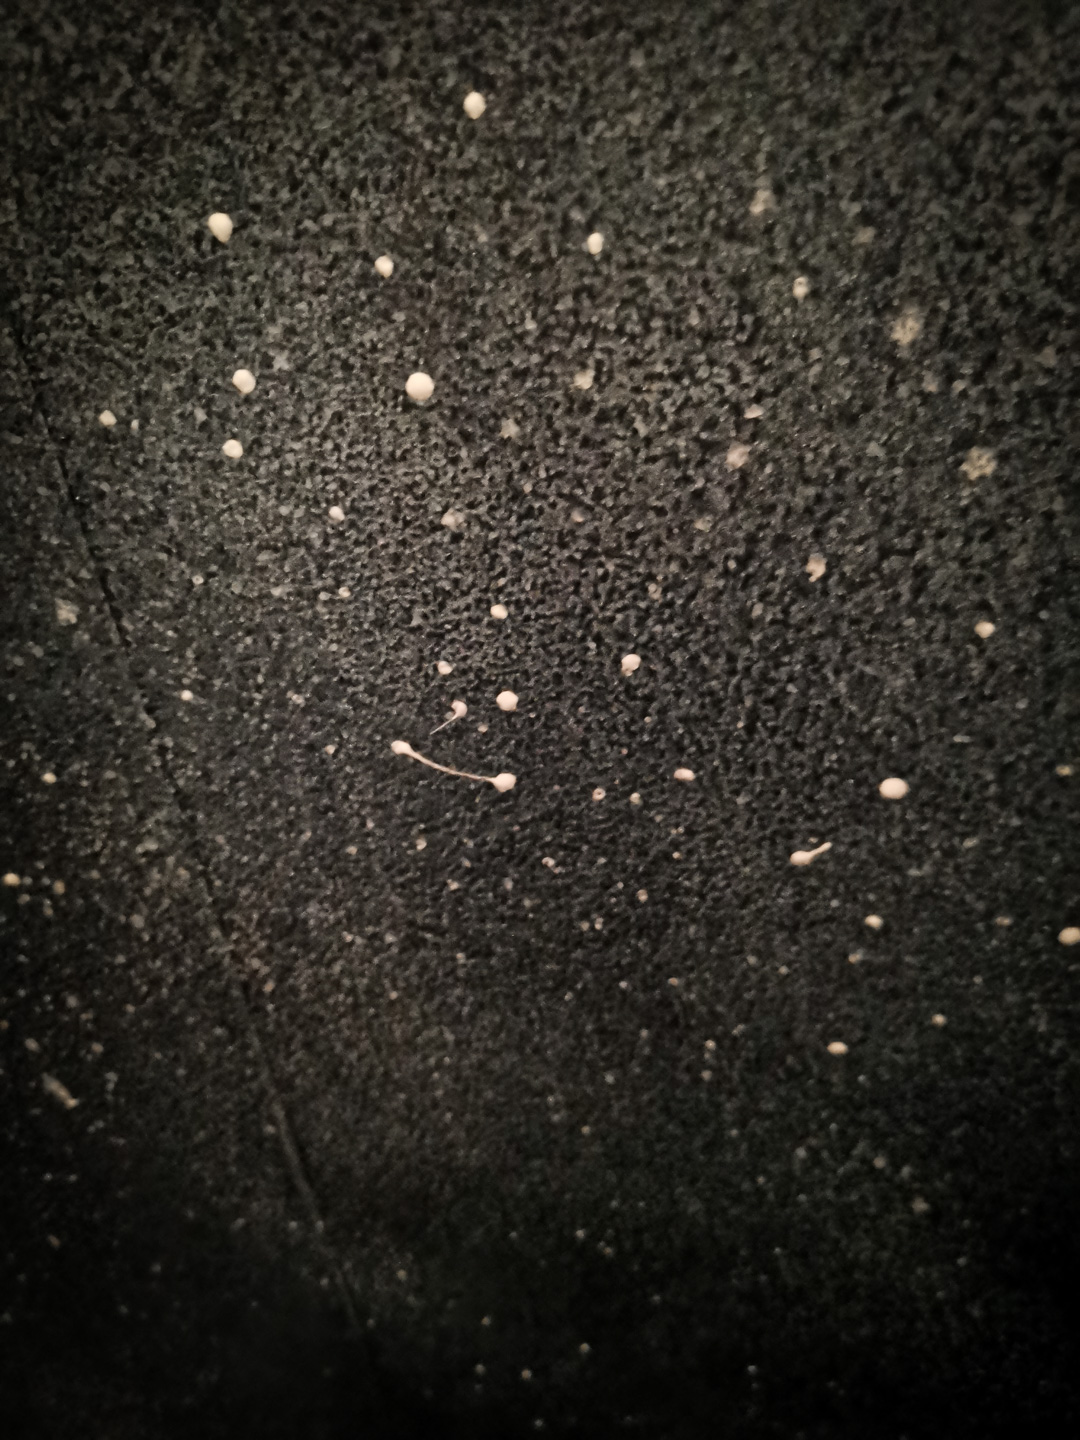
Repeat the last to steps until you are satisfied with the result. Let it dry again and then enjoy your work of art!
6. Walkthrough
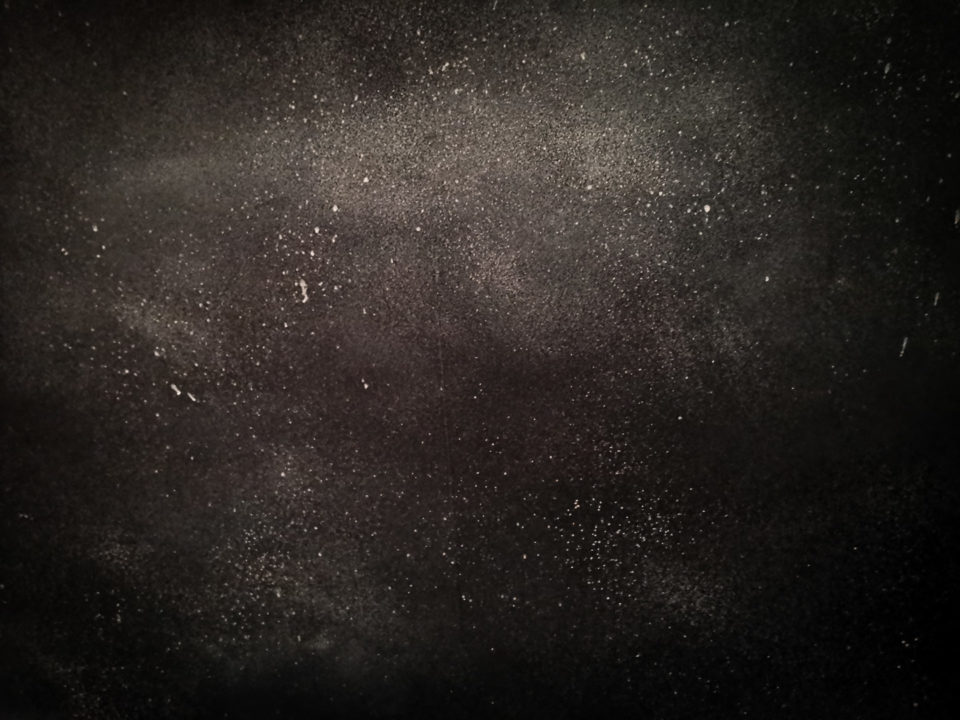
Sprayed:
Dabbing some larger stars:

And fill it with smaller:
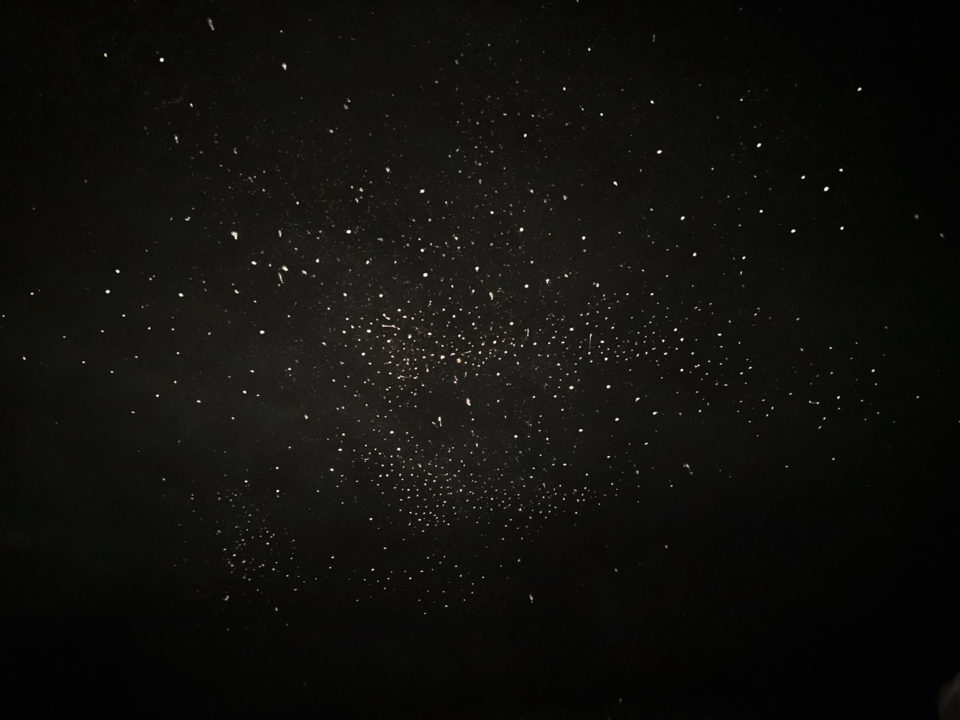
Repeat.

Finished 😀


Das sieht mal übel genial aus!
Das ist euer Schlafzimmer, nehme ich an? 🙂
Liebe Grüße, Anna
Danke ?
Ja, das wird das Schlafzimmer
Liebe Grüße zurück ?