


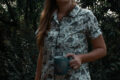
Since my last pants turned out quite successful, I thought I’d give it another shot.
I really got into wearing shorts during my pregnancy, and I was in desperate need of a pair that fit my post-pregnancy body well.
I knew I had some extra black elastic twill left over from my (planned) long-legged Ginger Jeans Pants. I decided to use it and traced both versions to ensure there was enough fabric.
To keep things simple and reduce the amount of fitting needed, I stuck with the Ginger Jeans pattern by Closet Core once again.

It might not be the most groundbreaking idea, to have two pairs of the same pattern in the same fabric, but at least I won’t have any scraps and a nice fitting pair of pants for every season. Win-Win!
I did make a few adjustment compared to my first pair.
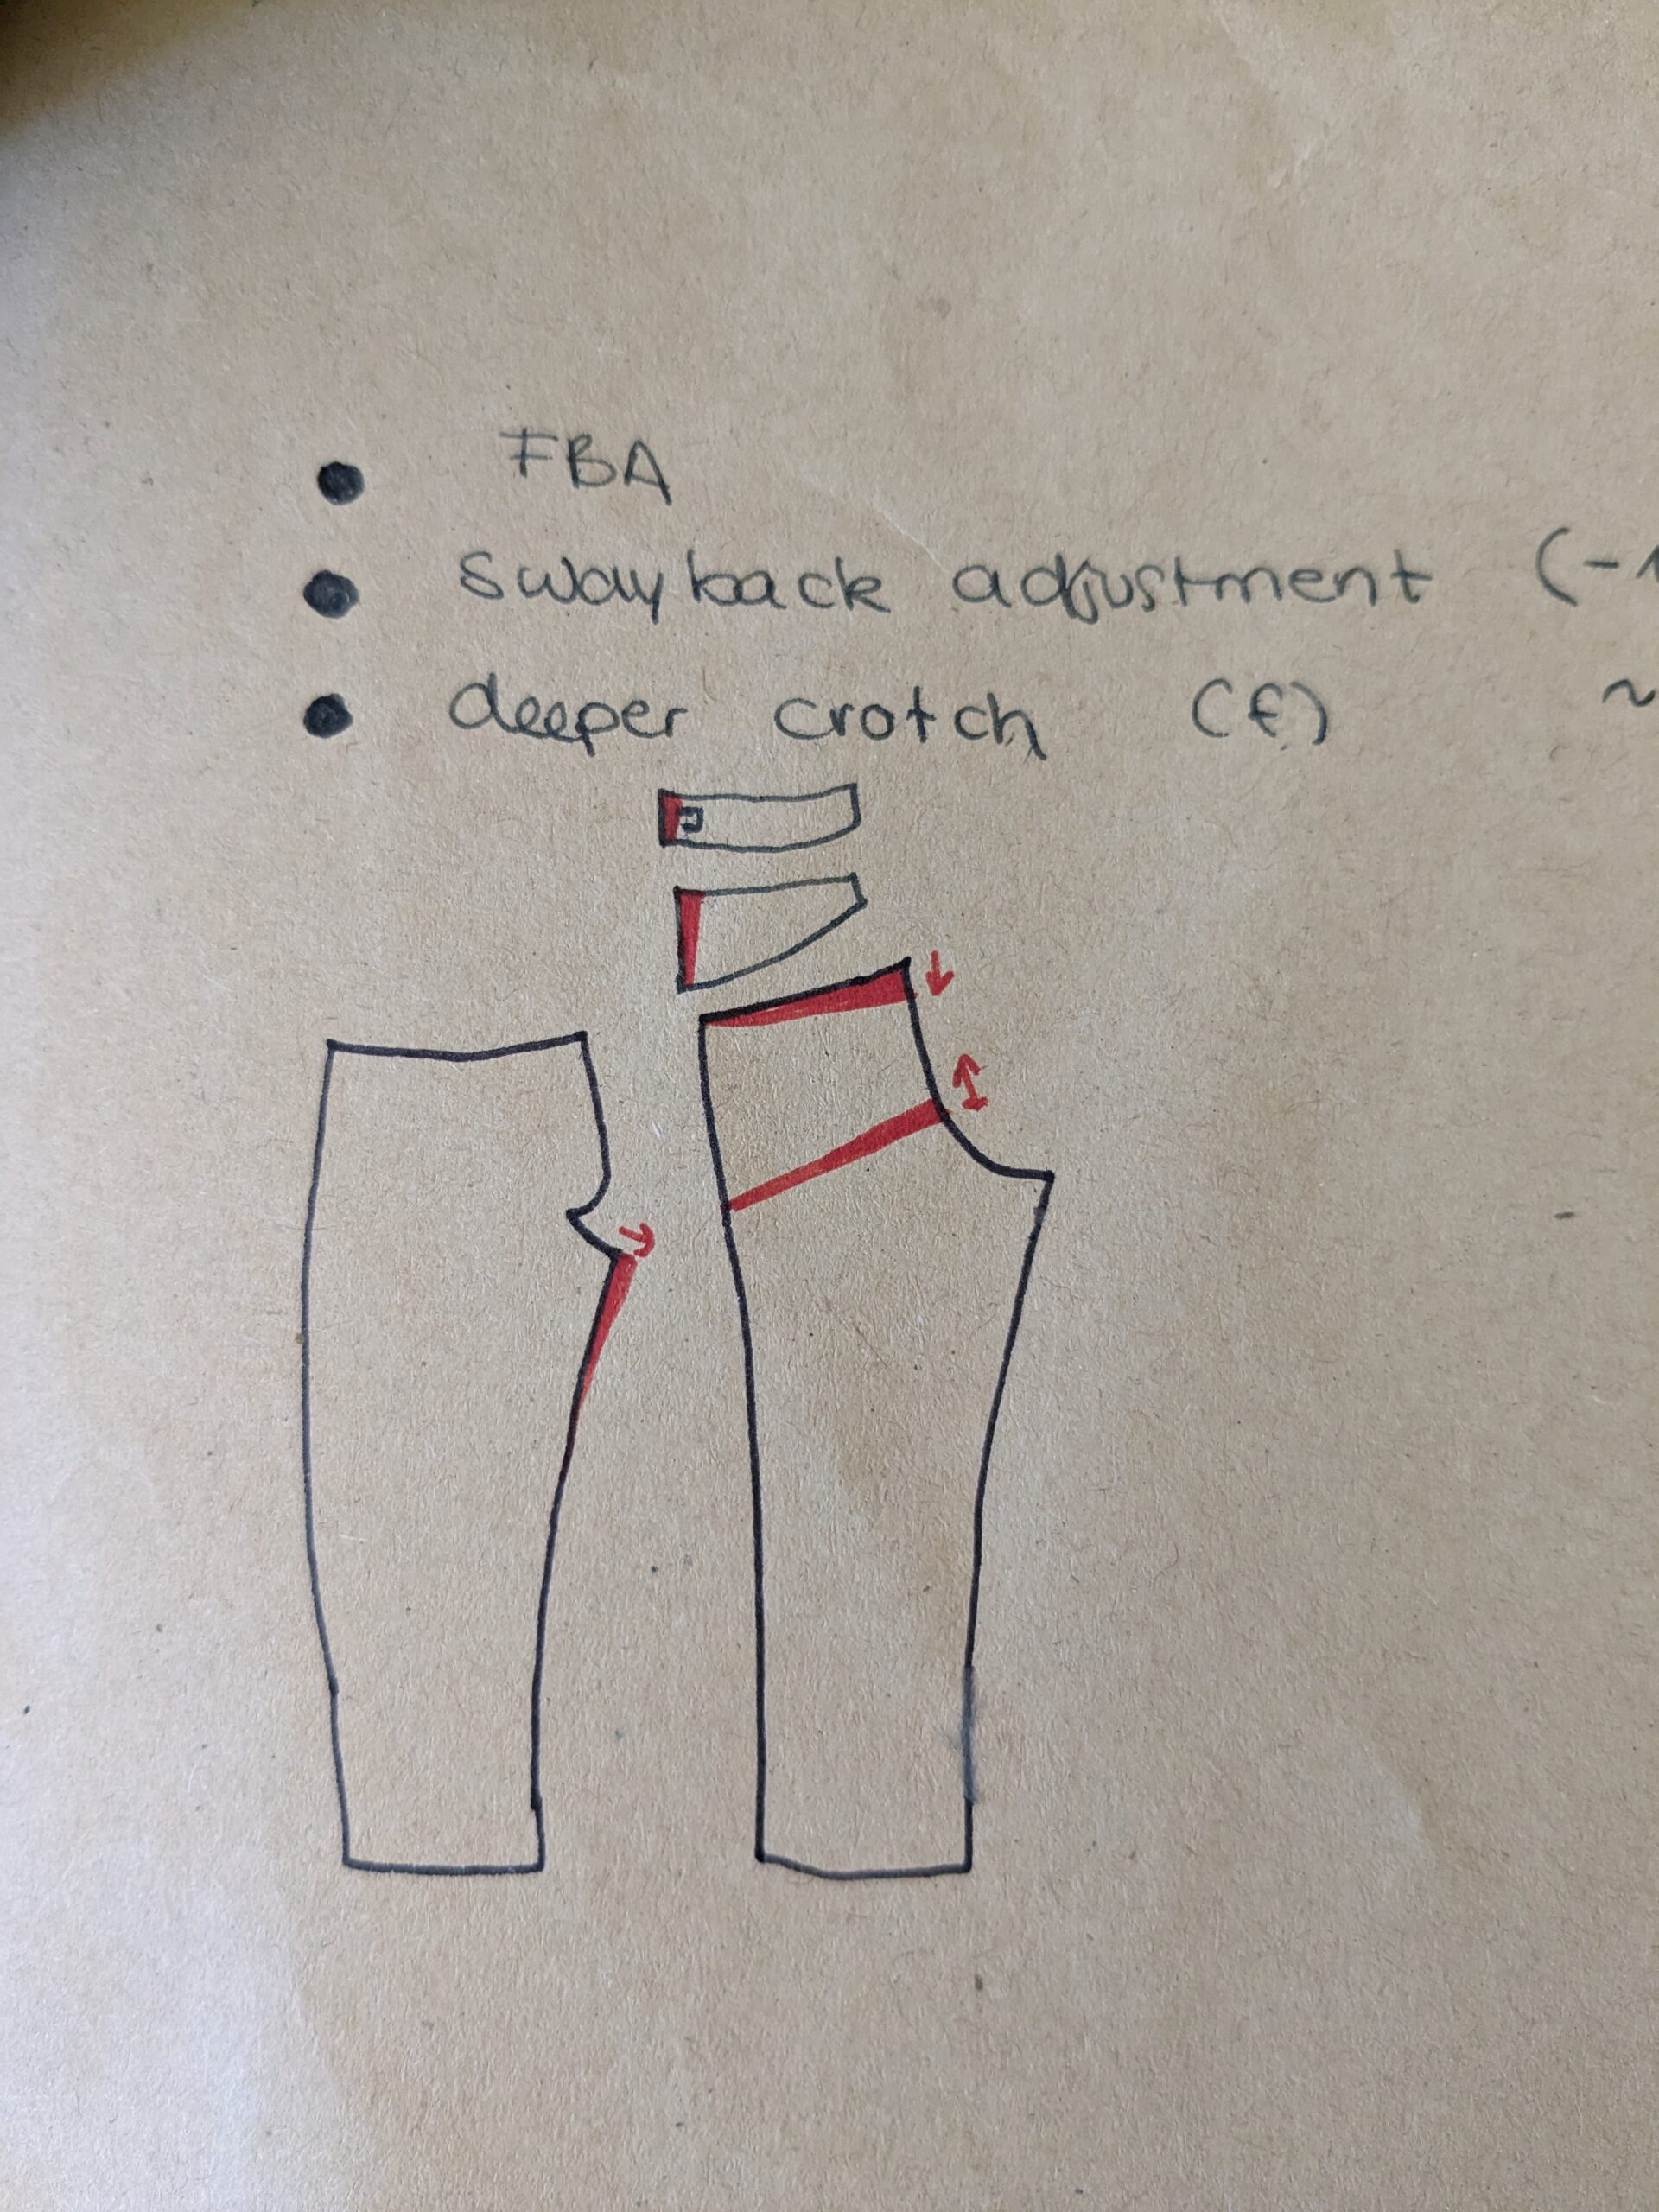
I created a bit more room for my bum this time, as the last one feels a bit tight.
The back yoke was causing some creases, so I trimmed a wedge-shaped piece from both the center back waistband and yoke AND also cut off 1 cm lengthwise from the back leg.
I extended the crotch length, but I suspect I need more depth because it’ still quite tight.
I’ve already updated it on my full-length pattern, and hopefully, it’ll work out.
And of course, I enlarged the front pockets significantly.

Apart from that I just chopped of the legs to get the length I wanted after basting them together.
It worked just fine.
The only slightly annoying thing is that the hem of one leg likes to curl up – only one leg, mind you. I have no idea what’s happening here, but I can live with it for now.
Oh! I nearly forgot the zip-fly worked great this time. I have no idea where the problem was the other time.
Additionally, the waistband is a bit unstable. Like in the previous version, I reinforced it with knit-interfacing, and it worked well with the sturdier fabric, but this one is simply too thin.

For the insides, I used scraps from my partners Cameron Button-Up. It’s a poplin with different sea animals printed on it, and I wanted the pocket design to match.
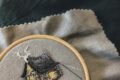
A few days ago, I stumbled upon an image of a hand-painted piece of clothing, although I don’t remember where or what it was.
Sadly, my fabric paints had mostly dried up, but I managed to gather all the primary colors and an opaque white for the base layer.

Conveniently, I had recently started drawing again after abandoning the hobby for several years, and had a whole sketchbook page filled with creepy sea creatures I could easily copy and paste onto my pocket.
I really liked the anglerfish and wanted to create the illusion of it lurking in the darkness. So, I started by painting the highlights with the opaque white color and added a few layers of color once it dried. I’m thrilled with the outcome!

If you’re interested, stay tuned for a future tutorial on this – it’s something you won’t want to miss!


Die Tasche ist großartig! Erst die bestickten Taschen und jetzt dein Gemälde, was für eine Entwicklung von Jeanstaschen in der Nähcommunity.
Grüße, Tina
Danke sehr 😀
Sehr schöne Shorts und die bemalte Tasche ist mega geworden. Wow das schaut echt klasse und verdammt gekonnt aus! Meine Bewunderung!!!
Vielen Dank 🙂
Meine Güte, wie cool!!! Was für ein Glück so kreativ zu sein!!! Liebe Grüße
Also diese Taschenmalerei macht aus simplen Shorts ein Kunstwerk. Wobei das Shorts nähen ansich ja auch nicht wirklich so simpel ist. Gefällt mir jedenfalls gut.
LG heike
Das ist echt eine coole Idee, die sonst recht schlichte Shorts aufzuhübschen! Und der Sitz der Hose ist auch ziemlich gut!
Eine Hose zweimal zu besitzen die jedesmal eine Passformoptimierung bekommt, finde ich ist eine tolle Idee. Die Hosentaschenbemalung ist ja so schön. LG Jeanette
wow! Das sieht klasse aus. Im ersten Moment dachte ich, das sei ein Panelstoff, aber gemalt! Respekt! Da schlummert ein großes Talent und ich freu mich schon auf mehr und ein Tutorial.
LG Miriam
So würde ich auch gerne zeichnen können. Respekt! Sieht wirklich toll aus. Das mit dem Bund hat man bei dünnen Stretch-Jeans eigentlich immer. Ich denke, dickere Einlage würde irgendwie nicht zum Rest passen. Man könnte den Bund vielleicht etwas schmaler machen, dann würden die Falten nicht so auffallen. Was das einseitige Rollen angeht: Hast du auch den Oberschenkelumfang gemessen? Wir sind alle ja lange nicht so symmetrisch, wie wir meinen 😉 Ansonsten habe ich keine weitere Idee, da ich davon ausgehe, dass du richtig auf den Fadenlauf geachtet hast usw.
Liebe Grüße
Tina
Die selbstgemalte Tasche ist ja mega, ein absoluter Hingucker.
LG, Heike